前言
最近又重新开始玩幸福工厂了,这游戏如果长期玩的话,部署在服务端上还是很有必要的,长期开服可以在玩家没玩的时候,材料依旧在生产。
1panel面板的部署就不说了,官网一键部署即可。
一、创建本地应用
进入
/opt/1panel/resource/apps/local目录。输入以下命令创建本地应用
1panel app init -k satisfactory-server -v 1.0.0
二、拉取服务端镜像
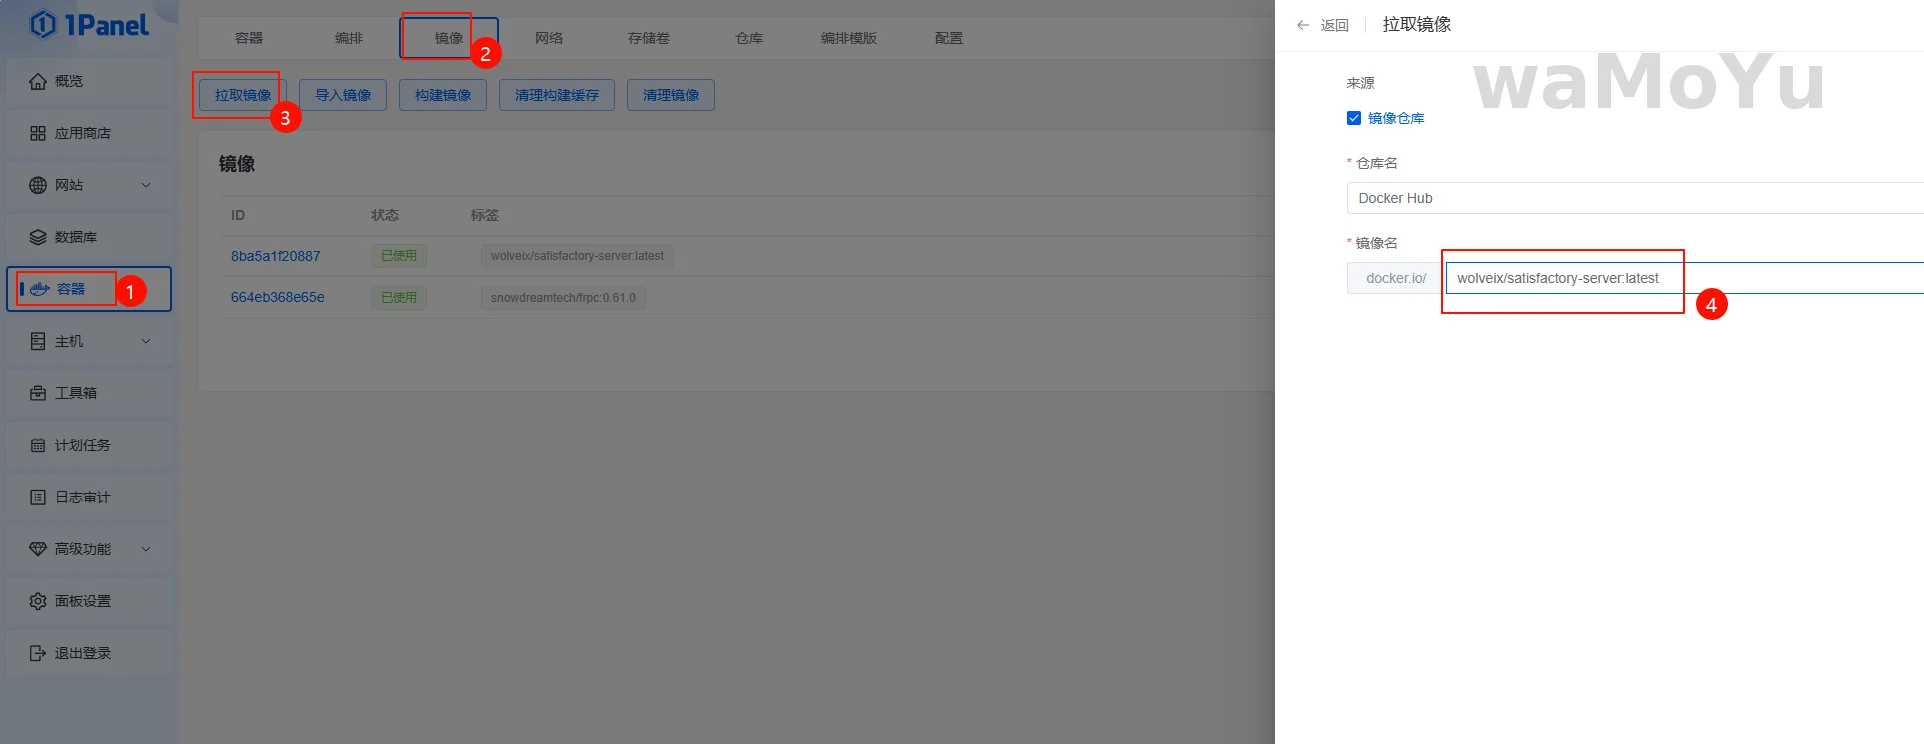
按照上图操作即可,镜像名称:wolveix/satisfactory-server:latest
三、配置本地应用文件
data.yml
vim /opt/1panel/resource/apps/local/satisfactory-server/data.ymladditionalProperties:
key: satisfactory-server #应用的 key ,仅限英文,用于在 Linux 创建文件夹
name: 幸福工厂服务端 #应用名称
tags:
- Tool #应用标签,可以有多个,请参照下方的标签列表
shortDescZh: 幸福工厂服务端 #应用中文描述,不要超过30个字
shortDescEn: 幸福工厂服务端 #应用英文描述
type: tool #应用类型,区别于应用分类,只能有一个,请参照下方的类型列表
crossVersionUpdate: #是否可以跨大版本升级
limit: #应用安装数量限制,0 代表无限制
website: https://github.com/wolveix/satisfactory-server #官网地址
github: https://github.com/wolveix/satisfactory-server #github 地址
document: https://github.com/wolveix/satisfactory-server #文档地址data.yml
vim /opt/1panel/resource/apps/local/satisfactory-server/1.0.0/data.ymladditionalProperties:
formFields:
- default: 7777
edit: true
envKey: PANEL_APP_PORT_UDP
labelEn: Port
labelZh: UDP端口
required: true
rule: paramPort
type: number
- default: 7777
edit: true
envKey: PANEL_APP_PORT_TCP
labelEn: Port
labelZh: TCP端口
required: true
rule: paramPort
type: number
# 玩家数量
- default: 4
edit: true
envKey: MAXPLAYERS
labelEn: 玩家数量
labelZh: 玩家数量
required: true
type: text
# 预留内存
- default: 4G
edit: true
envKey: memory
labelEn: test
labelZh: 预留内存
required: true
type: text
# 最大内存
- default: 12G
edit: true
envKey: MAXmemory
labelEn: test
labelZh: 最大内存
required: true
type: textdocker-compose.yml
vim /opt/1panel/resource/apps/local/satisfactory-server/1.0.0/docker-compose.ymlservices:
satisfactory-server:
container_name: 'satisfactory-server'
hostname: 'satisfactory-server'
image: 'wolveix/satisfactory-server:latest'
ports:
- '${PANEL_APP_PORT_UDP}:7777/udp'
- '${PANEL_APP_PORT_TCP}:7777/tcp'
volumes:
- './data/satisfactory-server:/config'
environment:
- MAXPLAYERS=${MAXPLAYERS}
- PGID=1000
- PUID=1000
- ROOTLESS=false
- STEAMBETA=false
restart: unless-stopped
deploy:
resources:
limits:
memory: ${memory}
reservations:
memory: ${MAXmemory}
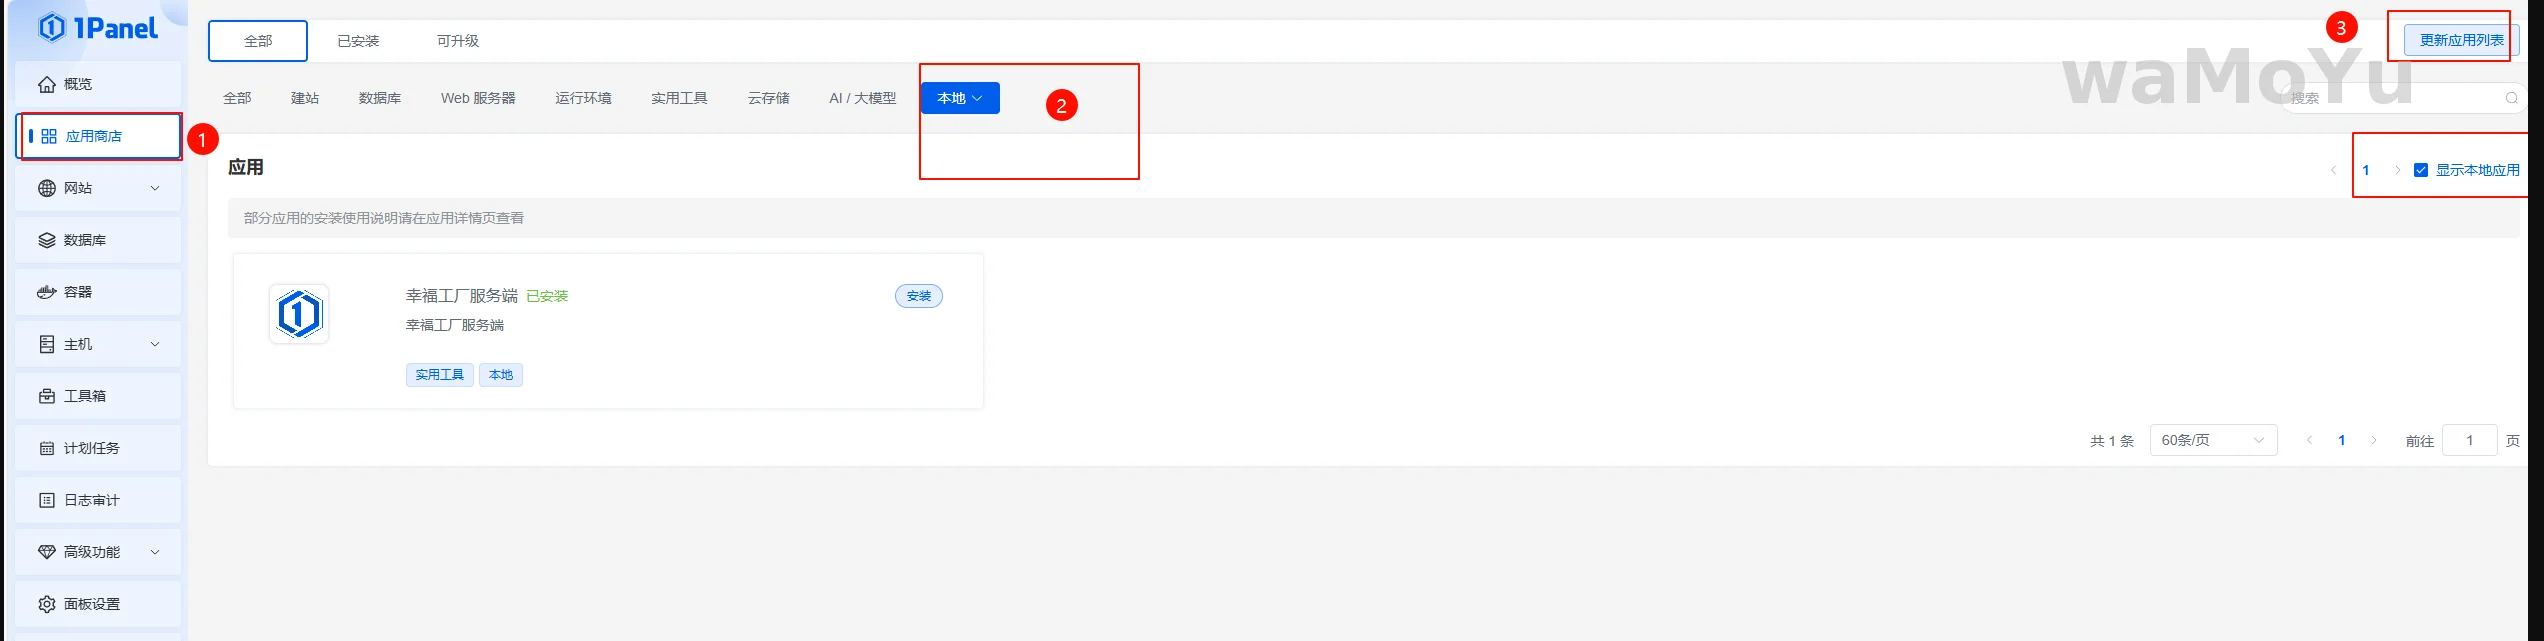
四、更新应用商店
注意选择显示本地应用
五、安装服务端应用
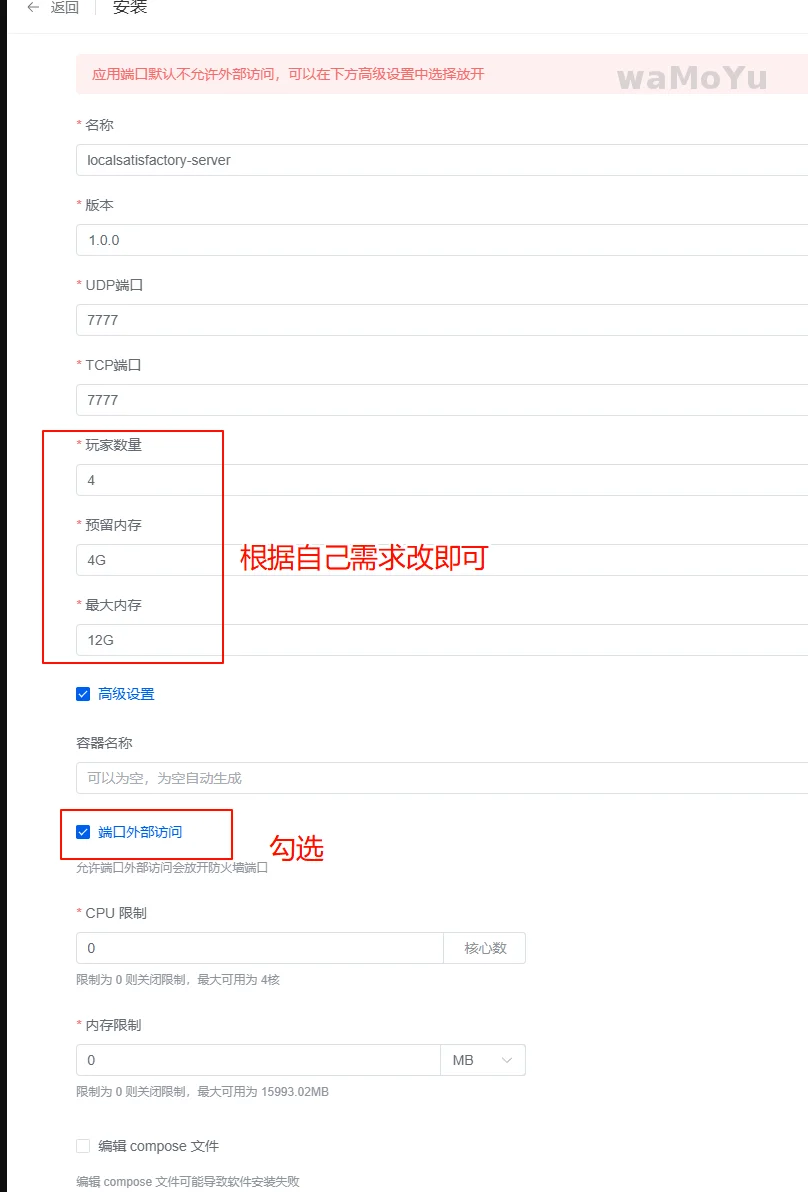
点击安装,然后根据需求编辑或者保持默认参数。
六、连接服务端
注意!如果是内网部署,请先看第七步!!!
打开游戏,在服务器管理处添加即可
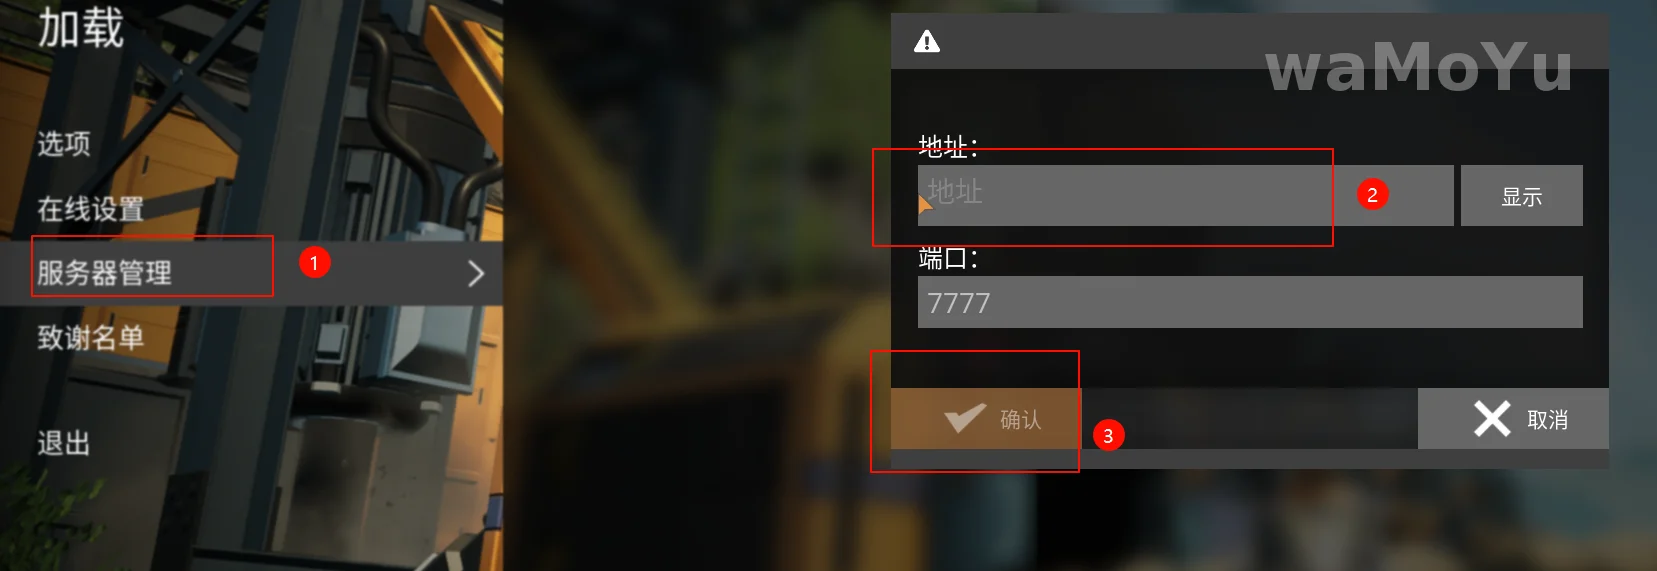
第一次连接,会让你设置管理密码这些,存档可以直接在游戏里面上传个人存档。
第一次启动容器会下载服务端,要等待一会,日志出现下图内容基本就可以了

七、内网穿透(可选)
如果是云服务器有公网IP则跳过该步骤即可。
直接按照frpc,然后配置tcp和udp的7777端口即可。
[[proxies]]
name = "幸福工厂-UDP7777"
type = "udp"
localIP = "幸福工厂容器IP"
localPort = 7777
remotePort = 7777
[[proxies]]
name = "幸福工厂-TCP7777"
type = "tcp"
localIP = "幸福工厂容器IP"
localPort = 7777
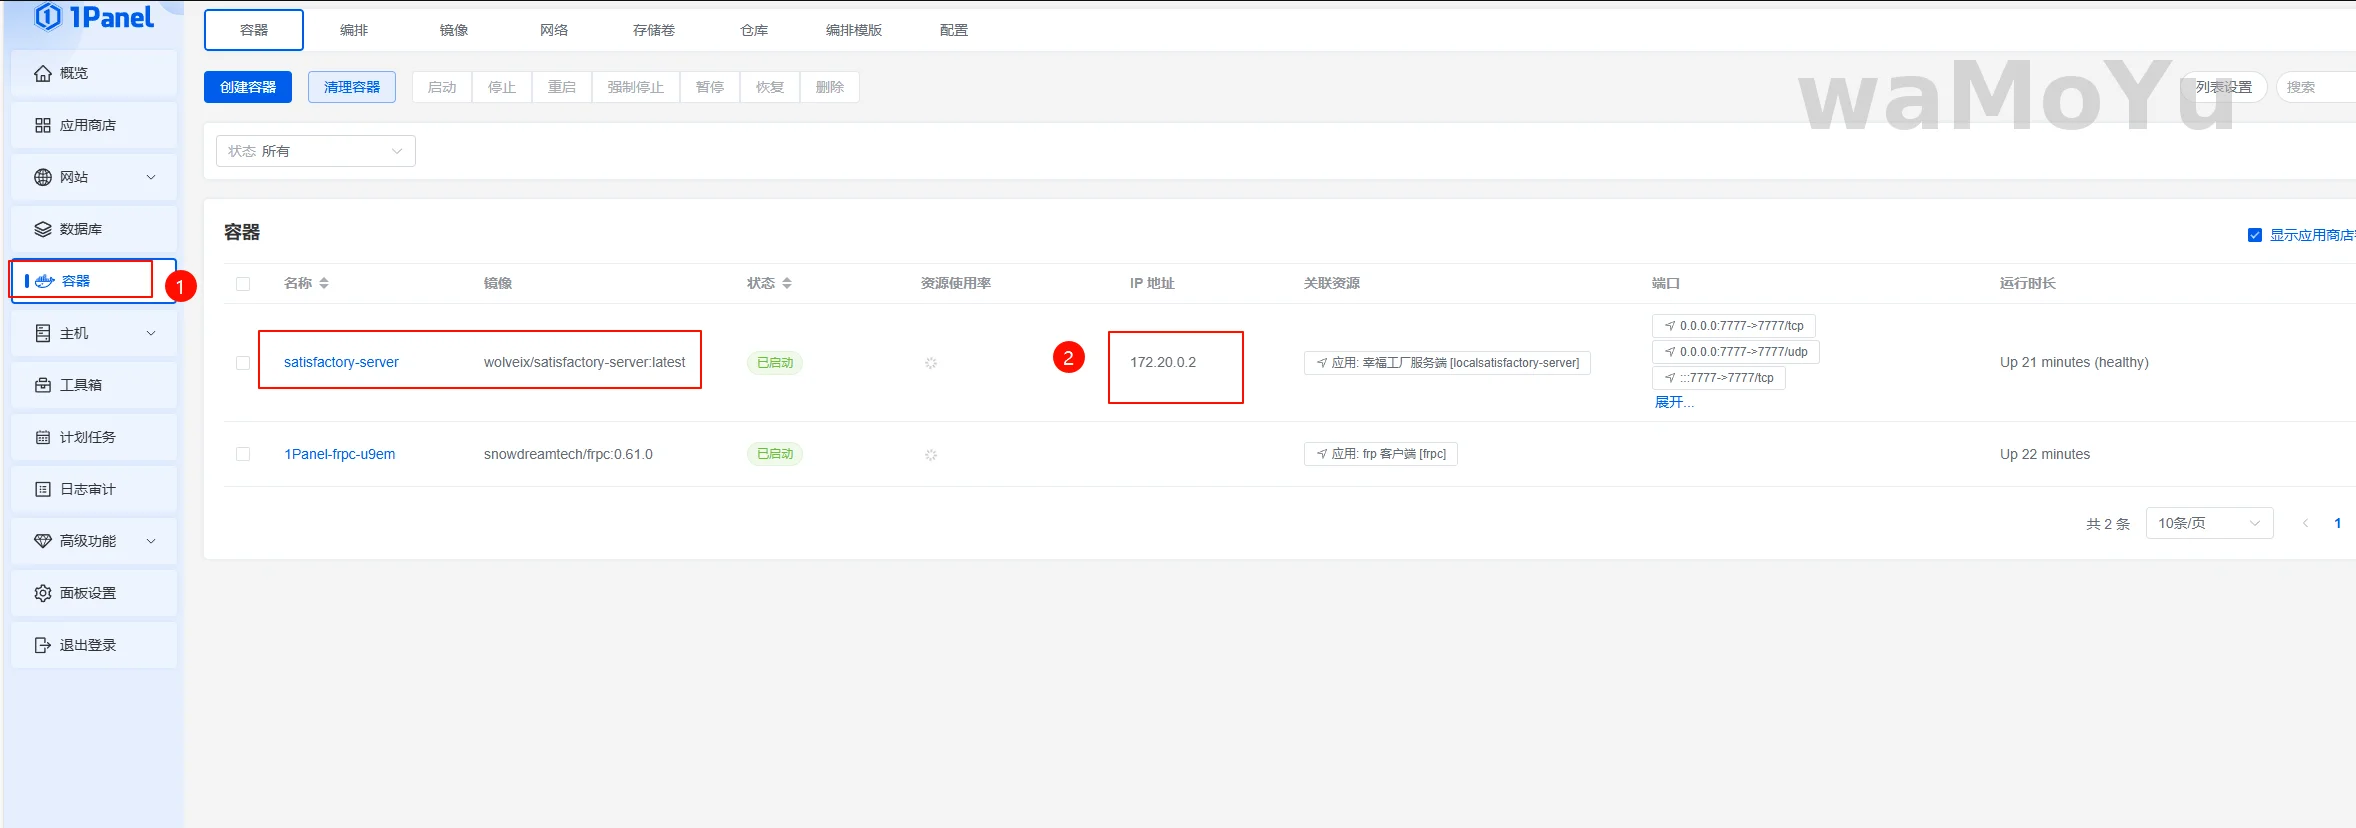
remotePort = 7777幸福工厂容器IP在下图处查看
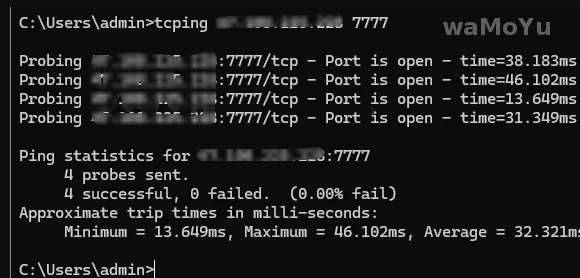
配置完毕后,在frps端查看是否成功穿透


然后ping以下看7777是否通了(前提是启动了幸福工厂服务端镜像)