
前言
Linux系列教程以Centos 7做例子。
安装系统版本:Centos 7.9
下载链接:https://mirrors.aliyun.com/centos/7.9.2009/isos/x86_64/?spm=a2c6h.25603864.0.0.6888f5adzFxnZa
镜像名称:CentOS-7-x86_64-DVD-2207-02.iso
准备工作
-
镜像文件夹创建
cd /opt/unetlab/addons/qemu/
mkdir linux-Centos-7.9.2009
-
磁盘创建
根据文档中最低磁盘大小要求,创建一个大小为20G的虚拟磁盘。
cd linux-Centos-7.9.2009/
/opt/qemu/bin/qemu-img create -f qcow2 virtioa.qcow2 20G
-
ISO镜像上传
使用工具(例如CRT、xshell、winscp等)将Centos 7的镜像上传到镜像文件夹中。

上传后,将镜像名称改为
cdrom.iso
-
在LAB中创建节点并启动
在任意LAB中创建Centos 7节点
系统安装
语言等根据自己需求设置就行。
分区为手动分区,==直接全部容量划分给根目录,标准分区,ext4==
系统优化
-
修改源
Centos7 阿里云源 https://developer.aliyun.com/mirror/
wget -O /etc/yum.repos.d/CentOS-Base.repo https://mirrors.aliyun.com/repo/Centos-7.repo
-
设置Hostname
在CentOS 7中,执行以下命令,用于指定使用模板所创建的云主机hostname以网卡IP地址命名。
hostnamectl set-hostname localhost.localdomain && bash -
配置网络。
为使模板创建出的云主机可自动获取IP地址,需修改网卡相关配置,执行命令如下:
sed -i '/ONBOOT=/cONBOOT=yes' /etc/sysconfig/network-scripts/ifcfg-eth0 #设置开机自动激活网卡 sed -i '/^UUID'/d /etc/sysconfig/network-scripts/ifcfg-eth0 #删除网卡配置文件中的UUID sed -i '/^HWADDR'/d /etc/sysconfig/network-scripts/ifcfg-eth0 #删除网卡配置文件中的物理地址 -
Qemu Guest Agent
使用以下命令安装QGA
yum install qemu-guest-agent -y使用以下命令设置QGA开机启动
systemctl enable qemu-guest-agent -
关闭selinux
用
getenforce命令检查SELINUX状态,如果返回Enforcing,则执行vi /etc/selinux/config命令修改SELINUX状态为disabled,保存并退出 -
安装cloud-init
1)运行以下命令检查是否已安装cloud-init。
Centos系列
rpm -qa | grep -i cloud-init
pip list | grep -i cloud-init
Ubuntu系列
dpkg -l | grep -i cloud-init
pip list | grep -i cloud-init
若无任何输出或版本低于社区0.7.9版本
2)安装Cloud-init
检测是否安装前置软件;
确保源服务器已安装Git、Python和Python PIP依赖库。
以安装Git、Python3.6和Python3-pip依赖库为例,Linux部分发行版的安装命令如下:
Centos系
yum -y install git python36 python3-pipUbuntu/Debian
apt-get -y install git python36 python3-pipOpenSUSE/SUSE
zypper -n install git python36 python3-pip前置软件安装完毕后通过以下命令安装Cloud-init:
-
下载源码包
git clone https://git.launchpad.net/cloud-init -
进入cloud-init目录
cd ./cloud-init -
运行以下命令安装所有依赖库**。**
sudo pip3 install -r ./requirements.txt -i http://pypi.douban.com/simple --trusted-host pypi.douban.com -
运行以下命令安装cloud-init。
python3 setup.py install -
修改配置文件cloud.cfg。
-
打开配置文件
vi /etc/cloud/cloud.cfg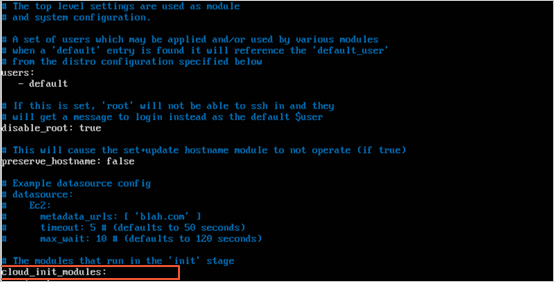
-
将
cloud_init_modules:之前的配置修改为以下内容。# Example datasource config # The top level settings are used as module # and system configuration. # A set of users which may be applied and/or used by various modules # when a 'default' entry is found it will reference the 'default_user' # from the distro configuration specified below users: - default user: name: root lock_passwd: False # If this is set, 'root' will not be able to ssh in and they # will get a message to login instead as the above $user disable_root: false # This will cause the set+update hostname module to not operate (if true) preserve_hostname: false syslog_fix_perms: root:root datasource_list: [ AliYun ] # Example datasource config datasource: AliYun: support_xen: false timeout: 5 # (defaults to 50 seconds) max_wait: 60 # (defaults to 120 seconds) # metadata_urls: [ 'blah.com' ] # The modules that run in the 'init' stage cloud_init_modules:
-
-
-
用户设置
添加一个admin用户,属于admin组,并且具有无密码的sudo权限。
useradd -m -s /bin/bash admin&&passwd -d admin删除root用户密码
passwd -d root -
sudo权限设置
echo "admin ALL=(ALL) NOPASSWD:ALL" >> /etc/sudoers -
SSH登入设置
cat <<EOF >> /etc/ssh/sshd_config
# 禁用了DNS反向解析
UseDNS no
# 记录SSH日志消息
SyslogFacility AUTHPRIV
# 允许root用户登入
PermitRootLogin yes
# 允许免密登入
PermitEmptyPasswords yes
EOF
cat <<EOF >> /etc/ssh/sshd_config UseDNS no AddressFamily inet SyslogFacility AUTHPRIV PermitRootLogin yes PasswordAuthentication no EOF -
GRUB
vi /etc/default/grub
GRUB_CMDLINE_LINUX="crashkernel=auto net.ifnames=0 console=tty0 console=ttyS0,115200n8"
grub2-mkconfig -o /boot/grub2/grub.cfg -
服务器信息显示(个人优化)
在Centos的系统中,
/etc/issue中的内容会在用户登入前显示,/etc/motd中的内容会在用户成功登入后显示。cd ~&&touch hello.sh&&chmod +x hello.sh#!/bin/bash truncate -s 0 /etc/issue truncate -s 0 /etc/motd # 获取物理网卡 IPV4地址、子网掩码、网卡名称 ipv4=$(ip addr | grep "scope global" | grep -v inet6 | grep -e eth -e ens | awk '{print($NF,"\t->",$2,"\033[0m")}') if [ -z "$ipv4" ]; then ipv4="Network not connected" fi # 获取发行版名称和版本 sys_name=`cat /etc/os-release | grep PRETTY_NAME | awk -F '=' '{print($2)}' | sed 's/"//g'` # 间隔符 t1="\033[34m+----------------------------\033[0m" t2="\033[34m|\033[0m\033[32m" t3="\033[0m" # 自定义信息 info=" $t1 $t2 $sys_name $t3 $t1 $t2 Default User: $t3 $t2 -> admin/NULL$t3 $t2 -> root/NULL $t3 $t1 $t2 $ipv4 $t1 " # /etc/issue 默认存在的信息 issue_def="\S Kernel \r on an \m" # /etc/motd 默认存在的信息 #motd_def="" echo "$issue_def" > /etc/issue echo -e "$info" >> /etc/issue #echo "$motd_def" > /etc/motd echo -e "$info" >> /etc/motd添加自定义服务
https://www.cnblogs.com/wutou/p/17024073.html
如果第一次开机未连接网络,那么
/etc/issue的内容不会变更,所以建议先将该目录内添加版本信息和账号信息。通过添加自定义服务,并且设置为开机启动,来运行脚本。
vim /etc/systemd/system/hello.service适用于Centos
[Unit]
Description=Welcome information
After=NetworkManager-wait-online.service

[Service]
Type=oneshot
User=root
ExecStart=/root/hello.sh

[Install]
WantedBy=multi-user.target
适用于Ubuntu
[Unit]
Description=Welcome information
After=networking.service

[Service]
Type=oneshot
User=root
ExecStart=/root/hello.sh

[Install]
WantedBy=multi-user.target
设置服务开启启动
systemctl enable hello.service
清除日志
要清除登录日志,包括SSH登录日志,你可以按照以下步骤进行操作:
-
以root用户身份登录到Debian系统。
-
使用以下命令清除SSH登录日志:
echo "" > /var/log/auth.log这将清空
/var/log/auth.log文件中的内容,其中包含SSH登录的日志记录。 -
使用以下命令清除其他登录日志(如登录失败的日志):
echo "" > /var/log/lastlog
echo "" > /var/log/wtmp
echo "" > /var/log/btmp
这将清空
/var/log/lastlog、/var/log/wtmp和/var/log/btmp文件中的内容,分别包含上一次登录记录、登录历史记录和登录失败记录。 -
最后,重新启动SSH服务以使更改生效:
systemctl restart ssh这将重新启动SSH服务并开始记录新的登录日志。
请注意,清除登录日志可能会破坏系统的安全审计和追踪功能。在执行此操作之前,请确保你了解清除日志的后果,并确保遵守适用的安全和合规要求。